So erstellen Sie Ihren eigenen Solargenerator zu Hause
In der heutigen Welt, in der erneuerbare Energien immer wichtiger werden, ist der Bau eines eigenen Solargenerators zu Hause eine spannende und praktische Lösung, um Ihre Haushaltsgeräte mit Strom zu versorgen und gleichzeitig Ihren CO2-Fußabdruck zu reduzieren. Dieses Verfahren ist nicht nur umweltfreundlich, sondern spart Ihnen langfristig auch Stromkosten. In diesem umfassenden Leitfaden erfahren Sie Schritt für Schritt, wie Sie Ihren eigenen Solargenerator zu Hause bauen. Dabei erhalten Sie alle Informationen, die Sie für den Aufbau eines nachhaltigen und effizienten Solarenergiesystems benötigen.
- Warum sollten Sie sich für einen Solargenerator für Ihr Zuhause entscheiden?
- Komponenten eines Solargenerators
- Schritte zum Erstellen Ihres eigenen Solargenerators zu Hause
- Tipps zur Wartung Ihres Solargenerators
Warum sollten Sie sich für einen Solargenerator für Ihr Zuhause entscheiden?
Solarenergie ist eine der zuverlässigsten und kostengünstigsten erneuerbaren Energiequellen. Mit einem eigenen Solargenerator profitieren Sie von einer stabilen und umweltfreundlichen Stromquelle. Solargeneratoren nutzen die Sonnenenergie über Solarmodule, speichern sie in einer Batterie und wandeln sie anschließend mit einem Wechselrichter in nutzbaren Strom um. So reduzieren Sie Ihre Abhängigkeit vom Stromnetz, senken Ihre Energiekosten und fördern die Nachhaltigkeit.
Solargeneratoren können für verschiedene Zwecke eingesetzt werden, von der Stromversorgung kleiner Geräte und Elektronik bis hin zur Notstromversorgung bei Stromausfällen. Darüber hinaus sind die Kosten für Solartechnologie in den letzten zehn Jahren deutlich gesunken, was sie für Hausbesitzer, die an netzunabhängigen Stromsystemen interessiert sind, attraktiver macht.
>>Siehe auch: So erhalten Sie 2024 kostenlose Solarmodule von der Regierung
Komponenten eines Solargenerators
Für den Bau eines eigenen Solargenerators zu Hause sind einige wesentliche Komponenten erforderlich, die jeweils eine entscheidende Rolle bei der Erzeugung und Speicherung von Solarenergie spielen. Schauen wir uns diese Komponenten genauer an:
1. Solarmodule
Das Herzstück Ihrer Solaranlage sind die Solarmodule. Diese fangen Sonnenlicht ein und wandeln es in Gleichstrom um. Die Anzahl der benötigten Module hängt vom Energiebedarf der zu versorgenden Geräte und der Sonneneinstrahlung an Ihrem Standort ab. Solarmodule bestehen in der Regel aus Siliziumzellen, die Sonnenenergie hocheffizient einfangen.
2. Laderegler
Ein Solarladeregler reguliert den Stromfluss von den Solarmodulen zur Batterie. Ohne einen Laderegler kann Ihre Batterie überladen werden, was ihre Lebensdauer und Effizienz verringern kann. Diese Komponente sorgt dafür, dass Ihre Batterie sicher und optimal geladen wird.
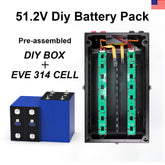
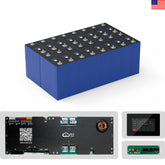
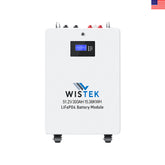
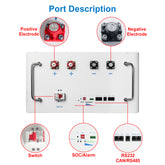
3. Batteriebank
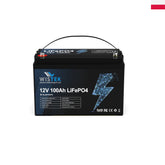
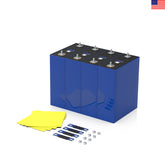
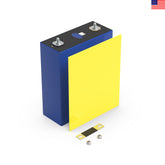
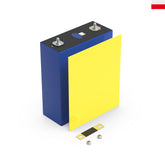
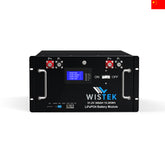
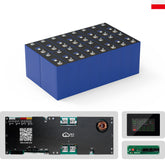
Der Batteriespeicher speichert die von Ihren Solarmodulen erzeugte Energie für die spätere Nutzung. Sie können zwischen verschiedenen Batterietypen wählen, z. B. Blei-Säure-, Lithium-Ionen- oder Gel-Batterien. Lithium-Ionen-Batterien sind im Allgemeinen effizienter, kompakter und haben eine längere Lebensdauer als Blei-Säure-Batterien, sind aber auch teurer.
4. Wechselrichter
Ein Wechselrichter wandelt den in der Batterie gespeicherten Gleichstrom in Wechselstrom um, den die meisten Haushaltsgeräte nutzen. Je nach Bedarf können Sie sich für einen reinen Sinus-Wechselrichter entscheiden, der sauberen, stabilen Strom liefert, ideal für empfindliche Elektronik, oder für einen modifizierten Sinus-Wechselrichter, der günstiger ist, aber nicht für alle Geräte geeignet ist.
5. Verkabelung und Anschlüsse
Sie benötigen außerdem die richtigen Kabel und Anschlüsse, um alle Komponenten Ihres Solargenerators anzuschließen. Stellen Sie sicher, dass die Kabel dick genug sind, um den erforderlichen Strom zu leiten, und dass sie ausreichend isoliert sind, um elektrische Gefahren zu vermeiden.
Schritte zum Erstellen Ihres eigenen Solargenerators zu Hause
Nachdem Sie nun die grundlegenden Komponenten kennen, die Sie zum Bau Ihres eigenen Solargenerators zu Hause benötigen, lassen Sie uns den Vorgang Schritt für Schritt durchgehen.
Schritt 1: Bestimmen Sie Ihren Strombedarf
Bevor Sie mit der Montage Ihres Solargenerators beginnen, ist es wichtig, Ihren Energiebedarf zu kennen. Überlegen Sie, welche Geräte Sie mit Ihrem Solargenerator betreiben möchten, z. B. Lampen, Kühlschrank, Fernseher oder Telefonladegerät. Berechnen Sie deren Stromverbrauch in Watt. Wenn Sie beispielsweise eine 100-Watt-Glühbirne fünf Stunden lang mit Strom versorgen möchten, benötigen Sie 500 Wattstunden (Wh) Energie.
Sie können einen Online-Rechner verwenden oder einen Elektriker konsultieren, um Ihren gesamten Energiebedarf zu ermitteln. Sobald Sie wissen, wie viel Strom Sie benötigen, können Sie die Größe der benötigten Solarmodule und des Batteriespeichers bestimmen.
Schritt 2: Wählen Sie die richtigen Solarmodule aus
Wählen Sie die passende Anzahl an Solarmodulen entsprechend Ihrem Energiebedarf. Solarmodule gibt es in verschiedenen Wattstärken, typischerweise zwischen 100 und 400 Watt pro Modul. Benötigen Sie beispielsweise 1.000 Watt Solarstrom, könnten Sie vier 250-Watt-Module wählen. Achten Sie bei der Auswahl der Solarmodule auch auf die Effizienzklasse und die Herstellergarantie.
Schritt 3: Wählen Sie einen Laderegler
Wählen Sie anschließend einen Solarladeregler, der zur Kapazität Ihrer Solaranlage passt. Der Laderegler sorgt dafür, dass Ihr Batteriespeicher sicher und effizient geladen wird und verhindert so Überladung und Schäden. Als Faustregel gilt: Verwenden Sie einen Laderegler, der mindestens 20 % mehr Strom liefert als die Leistung Ihrer Solarmodule.
Schritt 4: Wählen Sie eine Batteriebank
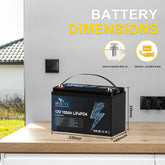
Die Wahl des richtigen Batteriespeichers ist entscheidend für die Speicherung der von Ihren Solarmodulen erzeugten Energie. Um die Größe Ihres Batteriespeichers zu berechnen, multiplizieren Sie die zu speichernde Energiemenge mit der Spannung Ihres Systems (normalerweise 12 V oder 24 V). Wenn Sie beispielsweise 1.000 Wattstunden speichern müssen und ein 12-V-System verwenden, benötigen Sie einen Batteriespeicher mit 83,33 Amperestunden (1.000 Wattstunden ÷ 12 Volt = 83,33 Amperestunden).
Je nach Budget und Vorlieben können Sie zwischen Blei-Säure- und Lithium-Ionen-Batterien wählen. Lithium-Ionen-Batterien sind zwar in der Anschaffung teurer, halten aber länger und erfordern weniger Wartung. Blei-Säure-Batterien sind günstiger, haben aber eine kürzere Lebensdauer.
Schritt 5: Installieren Sie den Wechselrichter
Sobald Ihre Solarmodule über den Laderegler mit Ihrem Batteriespeicher verbunden sind, müssen Sie einen Wechselrichter installieren, um den Gleichstrom in Wechselstrom umzuwandeln. Der von Ihnen gewählte Wechselrichter sollte der Leistung Ihres Batteriespeichers entsprechen und die Wattzahl der von Ihnen geplanten Geräte bewältigen können.
Wenn Sie empfindliche Elektronik wie Computer oder medizinische Geräte mit Strom versorgen möchten, entscheiden Sie sich für einen Wechselrichter mit reiner Sinuswelle. Dieser Wechselrichtertyp liefert sauberen, stabilen Strom und ist ideal für empfindliche Geräte. Für einfache Haushaltsgeräte reicht ein modifizierter Sinuswellen-Wechselrichter aus und ist günstiger.
Schritt 6: Verkabelung und Anschlüsse
Verdrahten Sie die Komponenten sorgfältig miteinander. Verbinden Sie die Solarmodule mit dem Laderegler und diesen mit dem Batteriespeicher. Verbinden Sie anschließend den Batteriespeicher mit dem Wechselrichter und schließen Sie den Wechselrichter an die Geräte an, die Sie mit Strom versorgen möchten. Achten Sie darauf, dass alle Kabel ordnungsgemäß isoliert und die Anschlüsse sicher sind, um elektrische Probleme zu vermeiden.
Schritt 7: Testen Sie Ihren Solargenerator
Sobald alles angeschlossen ist, ist es Zeit, Ihren Solargenerator zu testen. Schalten Sie die Solarmodule ein und prüfen Sie den Ladezustand der Batteriebank. Stellen Sie sicher, dass der Wechselrichter ordnungsgemäß funktioniert, indem Sie ein kleines Gerät anschließen. Wenn alles reibungslos funktioniert, haben Sie erfolgreich Ihren eigenen Solargenerator zu Hause gebaut!
>>Siehe auch: Solar-Wechselrichter-Ladegeräte verstehen
Tipps zur Wartung Ihres Solargenerators
Ein Solargenerator erfordert nur minimale Wartung. Regelmäßige Kontrollen und Pflege gewährleisten jedoch einen optimalen Betrieb. Hier sind einige Tipps zur Wartung Ihres Solargenerators:
- Reinigen Sie die Solarmodule : Staub, Schmutz und Ablagerungen können die Effizienz Ihrer Solarmodule beeinträchtigen. Reinigen Sie sie regelmäßig mit Wasser und einem weichen Tuch.
- Überprüfen Sie die Batterie : Überprüfen Sie die Batteriepole auf Korrosion und reinigen Sie sie gegebenenfalls. Stellen Sie sicher, dass die Batterie die Ladung hält, und achten Sie auf Anzeichen von Verschleiß.
- Überwachen Sie das System : Verwenden Sie ein Überwachungssystem, um die Leistung Ihrer Solarmodule, Batteriebank und Ihres Wechselrichters zu verfolgen. Viele Laderegler und Wechselrichter verfügen über integrierte Überwachungsfunktionen.
Der Bau eines eigenen Solargenerators ist ein lohnendes Projekt, das Ihre Netzabhängigkeit reduziert und gleichzeitig die Nachhaltigkeit fördert. Mit den richtigen Komponenten, fachgerechter Installation und regelmäßiger Wartung können Sie die Vorteile der Solarenergie jahrelang nutzen. Ob Sie eine Notstromversorgung suchen oder einfach Ihren CO2-Fußabdruck reduzieren möchten – ein Solargenerator ist eine intelligente und umweltfreundliche Wahl.
Denken Sie daran: Der Schlüssel zu einem erfolgreichen Solargenerator liegt in der Auswahl der richtigen Komponenten basierend auf Ihrem Energiebedarf. Mit den in dieser Anleitung beschriebenen Schritten können Sie einen Solargenerator bauen, der auf Ihre spezifischen Anforderungen zugeschnitten ist, und die zahlreichen Vorteile der Solarenergie nutzen.
Der Bau eines eigenen Solargenerators zu Hause bietet Ihnen nicht nur eine kostengünstige Energielösung, sondern ist auch ein Schritt in Richtung einer grüneren, nachhaltigeren Zukunft.






Leave a comment
All blog comments are checked prior to publishing