Best Way to Wire a Fish Finder to a Battery
Fishing enthusiasts rely on fish finders to improve their chances of a successful catch, but an improperly wired device can lead to performance issues or even equipment failure. Knowing the best way to wire a fish finder to a battery ensures optimal functionality, extended device lifespan, and uninterrupted fishing trips. In this guide, we’ll cover everything you need to know about properly wiring your fish finder, from selecting the right battery to troubleshooting common wiring problems.
- Why Properly Wiring a Fish Finder to a Battery Matters
- Choosing the Right Battery for Your Fish Finder
- How to Wire a Fish Finder to a Battery Properly
- Common Wiring Mistakes and How to Avoid Them
- Maintaining Your Fish Finder Wiring System
Why Properly Wiring a Fish Finder to a Battery Matters
Wiring a fish finder correctly to a battery is crucial for several reasons:
- Ensures consistent power supply – Poor wiring can lead to voltage drops, which can cause malfunctions.
- Prevents electrical interference – Proper wiring minimizes noise that may disrupt sonar readings.
- Extends battery life – Efficient connections reduce energy loss and prevent unnecessary drainage.
- Enhances device longevity – Secure and stable wiring reduces wear on the electrical components.
If you wire the battery incorrectly, your fish finder may experience erratic behavior, screen flickering, or even fail to turn on. Now, let’s go step by step on how to wire a fish finder to a battery correctly.
>>See also How to Choose the Right Kobalt Batteries Types, Features, and Performance
Choosing the Right Battery for Your Fish Finder
Before discussing the wiring process, it’s important to select a suitable battery for your fish finder. Here are the key factors to consider:
Types of Batteries for Fish Finders
1. Sealed Lead Acid (SLA) Batteries
- Affordable and widely available
- Heavy and require proper maintenance
- Not as efficient as lithium batteries
2. Lithium-Ion Batteries
- Lightweight and long-lasting
- More expensive but provide higher efficiency
- Requires a specialized charger for optimal performance
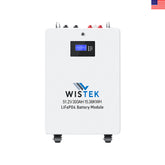
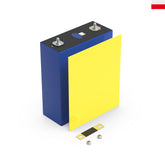
3. Lithium Iron Phosphate (LiFePO4) Batteries
- More stable and safer than lithium-ion batteries
- Long cycle life, making them cost-effective in the long run
- Higher upfront cost but excellent for long-term use
Selecting the right battery depends on your fishing style and power requirements. Lithium-based options offer the best performance, but if you’re on a budget, an SLA battery may be a viable alternative.
How to Wire a Fish Finder to a Battery Properly
Once you have the right battery, it’s time to wire it correctly. Follow these steps to ensure a safe and reliable connection.
1. Gather the Necessary Tools and Materials
Before you start wiring the battery, make sure you have:
- Fish finder unit
- Marine-grade electrical wire (typically 10-14 AWG)
- Inline fuse holder and fuse (usually 3A or as recommended by the manufacturer)
- Heat shrink tubing or electrical tape
- Wire connectors or crimp terminals
- Multimeter (for voltage testing)
2. Choose the Best Wiring Route
The route you take when wiring your fish finder to the battery affects performance and durability. Keep these tips in mind:
- Avoid running wires near other electrical components – This prevents interference that may affect the sonar.
- Use marine-grade wiring – Regular wires may corrode due to exposure to moisture.
- Secure all connections properly – Loose wires can cause voltage drops and inconsistent power delivery.
3. Connect the Inline Fuse to the Positive Wire
The inline fuse is essential for protecting your fish finder from power surges. Here’s how to install it:
1. Cut the positive wire close to the battery connection point.
2. Insert the inline fuse holder between the cut ends.
3. Secure the connections using crimp connectors.
4. Cover the connections with heat shrink tubing or electrical tape.
Using an inline fuse prevents damage to your fish finder in case of electrical faults.
4. Connect the Wires to the Battery
Now that the inline fuse is installed, follow these steps to wire the battery connection:
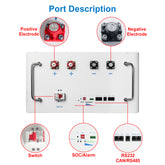
1. Connect the positive wire (red) to the battery’s positive terminal.
2. Connect the negative wire (black) to the battery’s negative terminal.
3. Use ring terminals for a secure and corrosion-resistant connection.
4. Tighten the connections and apply dielectric grease to prevent corrosion.
5. Test the Connection
Before finalizing the installation, use a multimeter to check the voltage. Your fish finder should receive a steady 12V or the voltage specified by the manufacturer. If everything looks good, power on your fish finder and confirm that it’s functioning properly.
Common Wiring Mistakes and How to Avoid Them
Even with careful installation, mistakes can happen. Here are some common errors and how to fix them:
Mistake 1: Using the Wrong Wire Gauge
- Problem: Thin wires cause voltage drops.
- Solution: Use marine-grade wires with the correct gauge (typically 10-14 AWG).
Mistake 2: Skipping the Inline Fuse
- Problem: A power surge can damage the fish finder.
- Solution: Always install an inline fuse close to the battery.
Mistake 3: Loose or Corroded Connections
- Problem: Loose wires lead to intermittent power loss.
- Solution: Use ring terminals and apply dielectric grease to prevent corrosion.
Mistake 4: Running Wires Near High-Power Devices
- Problem: Electrical interference disrupts sonar readings.
- Solution: Route wires away from motors, radios, and other electronics.
By avoiding these mistakes, you ensure a stable and long-lasting power connection for your fish finder.
>>See also What is the Difference Between EZGO Models A Comprehensive Comparison of the RXV and TXT
Maintaining Your Fish Finder Wiring System
Once you’ve wired your fish finder to a battery, regular maintenance is essential for peak performance.
Routine Maintenance Tips
- Check connections periodically – Loose or corroded wires can cause problems over time.
- Inspect the fuse regularly – Replace a blown fuse immediately.
- Keep the battery terminals clean – Corrosion can reduce power efficiency.
- Store the battery properly – When not in use, keep it in a dry place to extend its lifespan.
Taking care of your wiring setup ensures your fish finder operates reliably for years.
Wiring a fish finder to a battery correctly is crucial for reliable performance and long-term functionality. By selecting the right battery, using marine-grade wiring, installing an inline fuse, and avoiding common wiring mistakes, you ensure a stable power supply to your device. Regular maintenance further extends the lifespan of both your fish finder and battery.
Whether you’re a weekend angler or a seasoned fishing pro, following the best practices for wiring your fish finder to a battery will enhance your fishing experience and keep your equipment running smoothly trip after trip.






Leave a comment
All blog comments are checked prior to publishing