How will the bottom welding area of DIY battery cell studs affect the battery pack?
In the field of energy storage and electric vehicles, the topic of DIY battery assembly is gaining increasing attention. An often overlooked yet crucial aspect is the bottom welding area of DIY battery cell studs, which directly influences the performance, safety, and longevity of the entire battery pack. For anyone involved in DIY battery building, understanding how the bottom welding area of DIY battery cell studs affects the battery pack is essential for creating reliable and efficient power solutions.
- Understanding DIY Battery Construction: Fundamentals and Importance
- The Role of the Bottom Welding Area in DIY Battery Performance
- How the Bottom Welding Area of DIY Battery Cell Studs Impacts Safety
Understanding DIY Battery Construction: Fundamentals and Importance
The DIY battery movement is driven by enthusiasts and professionals alike, seeking to customize energy storage for specific applications, from electric bikes to large-scale home storage systems. At the heart of these projects are individual battery cells, interconnected to form modules and packs. The integrity of these connections, particularly the bottom welding area of DIY battery cell studs, plays a pivotal role in determining the overall battery pack's efficiency, durability, and safety.
>What are Battery Cell Studs in DIY Battery Projects?
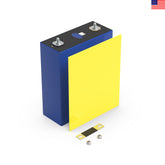
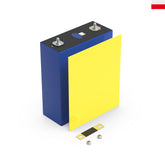
Battery cell studs are metallic posts or terminals attached to battery cells, allowing for secure electrical connections between cells and to other components such as busbars or wiring harnesses. In DIY battery builds, these studs are often welded or bolted onto the cell terminals, providing a robust and low-resistance electrical path.
Why Focus on the Bottom Welding Area of DIY Battery Cell Studs?
The bottom welding area is the section where the stud interfaces with the cell’s terminal, typically through a process such as spot welding or ultrasonic welding. This area is critical because it: - Provides the electrical connection path. - Ensures mechanical stability. - Affects heat dissipation during operation and charging. - Influences the resistance and, consequently, the efficiency of the battery pack. Neglecting the quality or design of the bottom welding area of DIY battery cell studs can lead to increased resistance, localized heating, mechanical failure, or even dangerous scenarios such as thermal runaway.
The Role of the Bottom Welding Area in DIY Battery Performance
Electrical Conductivity and Resistance
The primary role of the welding area is to create a low-resistance path for current flow. In DIY battery projects, even small increases in resistance at the welding point can cause significant power losses, especially in high-current applications.
>Factors Affecting Electrical Conductivity
Weld Area Size A larger bottom welding area generally reduces resistance, allowing more current to flow without excessive heating.
Weld Quality Uniform, full-penetration welds ensure consistent conductivity across the entire interface.
Material Compatibility Mismatched materials (e.g., aluminum stud to copper terminal) can increase resistance and promote galvanic corrosion.
Mechanical Stability and Vibration Resistance
The bottom welding area of DIY battery cell studs also provides mechanical anchorage. A weak or inconsistent weld may fail under vibration or repeated cycling, leading to intermittent connections or catastrophic failure.
Stress Distribution
Even Weld Distribution:** A well-designed weld area distributes mechanical stresses evenly, reducing the risk of cracks or detachment. Weld Thickness and Geometry:** Thicker, wider welds generally improve mechanical robustness, but excessive material can introduce stress concentrations.
Heat Dissipation and Thermal Management
DIY battery packs generate heat during operation, and the bottom welding area acts as a conduit for heat transfer. Adequate weld area ensures that heat can be efficiently conducted away from the cell interior, minimizing the risk of overheating.
Thermal Pathways
Direct Metal-to-Metal Contact Maximizes thermal conduction. Surface Cleanliness Contaminants at the weld interface can insulate and trap heat. Weld Uniformity Inconsistent welds create hot spots, increasing the likelihood of cell damage.
How the Bottom Welding Area of DIY Battery Cell Studs Impacts Safety
Risk of Overheating and Thermal Runaway
A poorly executed bottom welding area can restrict current flow, causing localized heating during charge and discharge cycles. Over time, this heating can degrade cell chemistry, increase internal resistance, and potentially trigger thermal runaway—a dangerous, self-accelerating reaction that can destroy the battery pack.
Preventing Electrical Fires
DIY battery projects are susceptible to electrical fires if connections are not properly managed. A sound bottom welding area of DIY battery cell studs reduces the risk of arcing, sparking, and excessive heating, which are common precursors to battery fires.
Ensuring Consistent Cell Balancing
Uniform welding across all cells ensures that each cell receives and delivers current at the same rate. Variations in weld quality or area can lead to imbalances, causing some cells to overwork and others to underperform, shortening the overall lifespan of the battery pack.
Design Considerations for the Bottom Welding Area in DIY Battery Packs
Selecting the Right Welding Technique
There are several welding methods used in DIY battery construction, each with its unique impact on the bottom welding area of DIY battery cell studs.
Spot Welding
Advantages Quick, can be automated, minimal heat affected zone. Drawbacks Limited weld area, may not penetrate deeply if not properly calibrated.
Ultrasonic Welding
Advantages No external heat, strong bonds, excellent for thin materials. Drawbacks Expensive equipment, may not be suitable for all battery chemistries.
Laser Welding
Advantages Precise, can create large-area welds with minimal distortion. Drawbacks High initial investment, requires precise setup.
Material Selection for Studs and Busbars
The choice of materials for both studs and busbars directly impacts the effectiveness of the bottom welding area of DIY battery cell studs.
Conductivity
Copper and nickel are popular choices due to their high conductivity and compatibility with common battery chemistries.
Corrosion Resistance
Nickel plating or stainless steel studs can improve corrosion resistance, especially in humid or high-temperature environments.
Optimizing Weld Geometry
The geometry of the weld area—its shape, size, and thickness—should be tailored to the specific requirements of the battery pack.
Circular vs. Linear Welds
Circular weld areas are often preferred for distributing current and mechanical stress evenly, while linear welds may be easier to automate but can create stress points.
Surface Preparation
Proper cleaning and preparation of the cell and stud surfaces ensure maximum contact and adhesion, reducing the risk of poor welds.
DIY Battery Pack Assembly Best Practices: Focus on the Bottom Welding Area
Pre-Weld Preparation
Clean All Surfaces:** Remove oxidation, oil, and dust from both the cell terminal and stud. Align Studs Precisely:** Misalignment can cause uneven welds and mechanical stress. Verify Equipment Settings:** Ensure welding equipment is calibrated for the specific materials and thicknesses.
Post-Weld Inspection
Visual Inspection Look for full, uniform weld coverage without visible gaps or weak spots. Electrical Testing Measure resistance across welds to ensure consistency. Mechanical Testing Apply moderate force to ensure the stud cannot be easily detached.
Ongoing Maintenance and Monitoring
Periodic Inspections Check for signs of corrosion, heating, or loosening of studs. Thermal Imaging Use infrared cameras to detect hot spots during operation. Electrical Balancing Monitor cell voltages to identify potential weld-related issues.
Common Problems with the Bottom Welding Area of DIY Battery Cell Studs
Incomplete Welds
Incomplete welds may result from insufficient pressure, low current, or dirty surfaces. These create high-resistance points that can eventually fail.
Overheating During Welding
Applying too much current or holding the weld for too long can damage the cell terminal, reducing capacity or causing internal shorts.
Material Incompatibility
Welding dissimilar metals without proper transition layers can lead to poor electrical and mechanical performance due to differences in melting points and expansion rates.
Corrosion and Environmental Degradation
Exposure to moisture or corrosive environments can degrade the weld area, increasing resistance and risking mechanical failure.
Case Studies: Impact of Bottom Welding Area Design in DIY Battery Builds
Case Study 1: High-Power Electric Bike Battery Pack
A DIY builder assembled a high-current battery pack using spot-welded studs. Initial performance was satisfactory, but after a few months, the pack exhibited voltage drops and excessive heating. Investigation revealed that the bottom welding area of several DIY battery cell studs was insufficient, leading to increased resistance and localized heating. A redesign with larger, more uniform welds restored performance.
Case Study 2: Home Energy Storage System
A home energy storage DIY project used ultrasonic welding for cell studs. After a year of cycling, the pack maintained excellent balance and minimal heating, attributed to the high-quality bottom welding area of DIY battery cell studs, which provided both low resistance and robust mechanical anchorage.
Case Study 3: Corrosion in Outdoor DIY Battery Packs
A solar-powered DIY battery pack installed outdoors saw premature failure due to corrosion at the weld interface. The bottom welding area was not adequately protected against moisture ingress, leading to increased resistance and eventual stud detachment. Subsequent builds incorporated corrosion-resistant materials and sealants, significantly improving longevity.
Innovations and Future Trends in DIY Battery Cell Stud Welding
Automated Welding Systems
DIY battery builders are increasingly adopting semi-automated and fully automated welding systems. These systems ensure consistent weld area size, depth, and quality, reducing the risk of human error and improving pack reliability.
Advanced Materials and Coatings
Emerging materials such as graphene-coated studs or nanostructured interfaces promise lower resistance and improved thermal management for the bottom welding area of DIY battery cell studs.
Integrated Monitoring Solutions
Smart battery management systems (BMS) now include sensors to monitor temperature and resistance at each cell connection, allowing for early detection of weld area issues and proactive maintenance.
How to Troubleshoot and Repair the Bottom Welding Area of DIY Battery Cell Studs
Diagnosing Connection Issues
Measure Voltage Drops: Significant drops across a weld indicate increased resistance. - Check for Heating: Use thermal cameras or touch (with caution) to identify hot spots. - Inspect for Corrosion:Look for discoloration or powdery deposits around the weld area.
Repair Techniques
Re-Welding Remove the faulty stud, clean the area, and reapply the weld with proper technique. Stud Replacement If the cell terminal is damaged, consider replacing the entire stud or, in severe cases, the cell itself. Protective Coatings Apply corrosion-resistant coatings to exposed weld areas.
Practical Tips for DIY Battery Builders: Maximizing the Bottom Welding Area Effectiveness
Always use compatible materials to avoid galvanic corrosion. - Invest in high-quality welding equipment and regularly calibrate it. - Practice welding on scrap materials before working on actual cells. - Document all welds and perform regular inspections during and after assembly. - Use protective coatings for outdoor or humid environments.







Leave a comment
All blog comments are checked prior to publishing