How to Connect Solar Panels to RV Batteries
When it comes to powering your RV while on the road, solar panels provide an excellent, sustainable solution. Learning how to connect solar panels to RV batteries is essential for anyone looking to reduce their reliance on traditional energy sources. In this article, we'll guide you through the process, step by step, and show you how to set up an efficient solar power system for your RV.
- Why You Should Use Solar Panels for Your RV
- How to Connect Solar Panels to RV Batteries: A Step-by-Step Guide
- Maintaining Your Solar Panel System
- Common Mistakes to Avoid When Installing Solar Panels on Your RV
- Connecting Solar Panels to RV Batteries
If you're considering solar power for your RV, you're probably also familiar with other outdoor maintenance tools, such as a hedge trimmer, which helps keep your surroundings neat and tidy. Similarly, understanding how to connect solar panels to RV batteries ensures that your energy needs are met while on the go.
>>See also What Does Ah Mean On A Battery And What Is Amp Hour
Why You Should Use Solar Panels for Your RV
Solar energy is an environmentally friendly and cost-effective way to power your RV, especially for long road trips. By harnessing the power of the sun, you can generate free energy, reduce your fuel consumption, and minimize your carbon footprint. Additionally, solar panels can provide a continuous power supply for lights, appliances, and even your RV’s air conditioning system.
Benefits of Solar Panels for RVs
- Sustainability: Solar panels use renewable energy, reducing your environmental impact.
- Cost Savings: Once installed, solar panels can help you save on fuel and generator costs.
- Independence: Solar energy allows you to power your RV without needing to plug into external power sources.
- Quiet Operation: Unlike traditional generators, solar panels work silently, ensuring a peaceful and enjoyable experience.
How to Connect Solar Panels to RV Batteries: A Step-by-Step Guide
Connecting solar panels to your RV batteries involves several key steps, including selecting the right components, wiring the system, and ensuring everything is securely installed. Let's break down the process.
Step 1: Choose the Right Solar Panel System
Before you can start connecting solar panels to your RV batteries, you need to choose a solar panel system that meets your energy needs. The size of your system will depend on factors such as how much electricity you use, the amount of sunlight you receive, and the space available for the panels.
Types of Solar Panels
There are three main types of solar panels to consider for your RV:
- Monocrystalline Panels: Known for their efficiency and long lifespan, these panels are typically more expensive but are ideal for limited roof space.
- Polycrystalline Panels: These are more affordable but slightly less efficient than monocrystalline panels.
- Thin-Film Panels: These are lightweight and flexible, but they require more space and may not be as efficient.
Step 2: Select the Right RV Batteries
To store the energy generated by your solar panels, you need high-quality batteries. RV batteries come in several different types:
- Lead-Acid Batteries: These are the most common type of RV battery and are generally more affordable. However, they require regular maintenance.
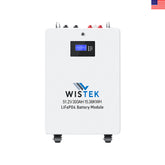
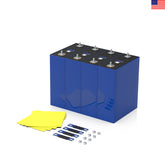
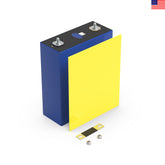
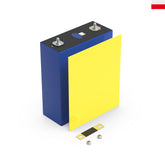
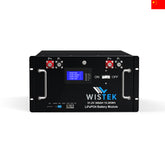
- Lithium-Ion Batteries: These are more expensive but have a longer lifespan and require less maintenance.
- AGM (Absorbent Glass Mat) Batteries: These are a type of sealed lead-acid battery, offering better performance and reliability.
When choosing batteries, it’s important to ensure that they are compatible with your solar panel system and provide enough capacity to meet your power needs.
Step 3: Install the Solar Panels
Once you've selected your solar panel system and batteries, it's time to install the solar panels on your RV's roof. Here's how:
- Determine the Best Placement: Position the solar panels where they will receive the most sunlight. Ideally, this should be a flat, unobstructed area on the roof.
- Mount the Panels: Use mounting brackets to securely attach the panels to your RV's roof. Be sure to follow the manufacturer's instructions for proper installation.
- Wiring the Panels: Connect the solar panels to the charge controller using the appropriate gauge wires. A charge controller is necessary to regulate the voltage and prevent overcharging the batteries.
Step 4: Connect the Charge Controller to the Batteries
The charge controller is responsible for regulating the power going into your RV batteries from the solar panels. To connect the charge controller to your batteries:
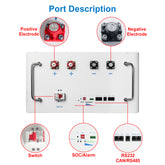
- Wiring: Use heavy-duty cables to connect the charge controller to your RV's batteries. Be sure to follow the manufacturer’s guidelines for proper wiring.
- Install the Fuse: A fuse should be installed between the charge controller and the batteries to protect the system in case of a short circuit or other issues.
Step 5: Monitor the System
After your solar panel system is installed, you’ll want to monitor its performance. Many modern solar setups include a monitoring system that can display real-time information on the status of your solar panels and batteries. This will help you ensure that your system is functioning correctly and that your batteries are being charged efficiently.
Maintaining Your Solar Panel System
Once your system is set up, regular maintenance is key to ensuring long-lasting performance. Just like how you regularly maintain your hedge trimmer to ensure it cuts efficiently, your solar power system requires routine checks.
Check for Obstructions
Ensure that the solar panels are not obstructed by dirt, leaves, or other debris. Cleaning the panels periodically will help maintain their efficiency.
Battery Maintenance
If you’re using lead-acid batteries, check the water levels and top them up as needed. For lithium-ion batteries, ensure that they’re not exposed to extreme temperatures, which can affect their performance.
Regular System Inspections
Periodically check the wiring, charge controller, and other components of the solar panel system for signs of wear or damage. Ensuring everything is in good working condition will help you avoid issues while you're on the road.
Common Mistakes to Avoid When Installing Solar Panels on Your RV
While installing solar panels on your RV is a straightforward process, there are a few common mistakes that beginners often make. Avoiding these mistakes can save you time, money, and frustration.
Using the Wrong Size System
It’s essential to properly size your solar panel system according to your power needs. If you install a system that’s too small, you may find that your batteries don’t get fully charged. On the other hand, a system that’s too large can be unnecessarily expensive.
Poor Battery Placement
Make sure your RV batteries are placed in a well-ventilated, cool area. Heat can degrade battery life, so placing your batteries in a hot or cramped space can lead to poor performance.
Inadequate Wiring
Using the wrong size wire for your solar panel system can cause overheating, poor performance, or even system failure. Always use the recommended wire sizes specified by the manufacturer.
>>See also BCI Group 3478 Batteries, All You Need To Know
Connecting Solar Panels to RV Batteries
Connecting solar panels to RV batteries is a valuable upgrade that can enhance your RV experience by providing sustainable and cost-effective power. The process is simple when broken down into clear steps: choose the right system, install the components, and maintain the setup. And just like maintaining your hedge trimmer, regular care and checks on your solar power system will ensure its efficiency and longevity.
Now that you know how to connect solar panels to RV batteries, you can enjoy the freedom of traveling without worrying about your energy needs. Whether you’re heading out for a weekend getaway or embarking on a cross-country adventure, a well-installed solar system will keep your RV powered and ready for anything.
By following this guide, you’re one step closer to becoming energy independent while on the road. And remember, just as you’d use a hedge trimmer to keep your campsite looking neat, regular maintenance and care for your solar system will keep it working smoothly for years to come.






Leave a comment
All blog comments are checked prior to publishing